"De-Tuscanization"

Definition: De-Tuscanize - modernizing a tuscan style home; homes in the Tuscan design, the region of Central Italy in the Mediterranean, with an Old World feel with granite, stone, travertine floors, interior arches, terracotta roof tiles, ornate features and color schemes such as brown, red and gold.
When my clients hired me to de-tuscanize their home I knew this was going to be an exciting challenge. The house was custom built a little over 20 years ago and designed by a professional. It was done beautifully and every detail was style specific, but it was time for a refresh. The window treatments were heavy, the colors were drab and the house seemed dark and outdated.
The living room area is large, has great views and light, but was not connected to the kitchen so it was never utilized. The kitchen was small and shared a family room area that was closed off by the kitchen peninsula. Everyone would hang out cramped in these two spaces when there was so much other space begging to be used.
I knew the peninsula had to go so that we could open up the space and create a huge island. I also knew we needed to open up the wall into the dining room. I was not sure on opening the wall into the living room but after much thought we did it, and boy was it a great move. The view from the sink looking in to the living room and new fireplace is just beautiful.
Once we decided to open up all the walls we had to remove the existing flooring which we replaced with a warm dark wood. Guys, I have to say that when I look at these after photos your about to see I completely choke up.
We removed the arched soffit so we can visually create one big open space. My clients chose to remove the breakfast nook and opted for seating on the island. Their kids are grown and gone and it is just the two of them.

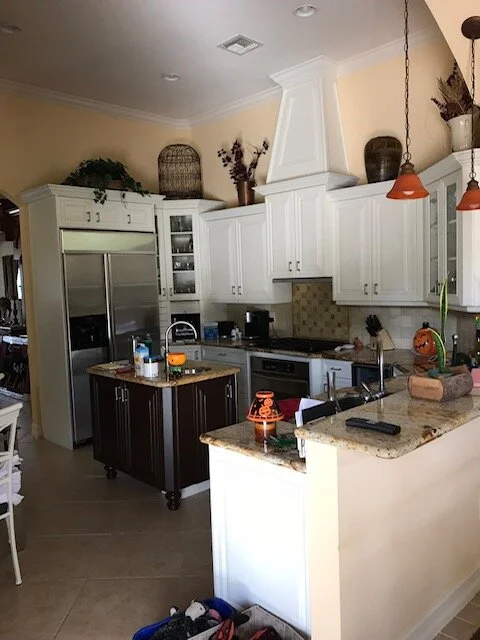
Kitchen/Family Room before photos (above)

2019 © Nickolas Sargent Photography
Kitchen/Family Room after photos (above)
The opening to the right in the photo above is the opening into the living room, this is the view (below) you see now while standing at the island.

2019 © Nickolas Sargent Photography

2019 © Nickolas Sargent Photography
This is a closer look at the Family Room. We removed that giant built in and softened everything up. We added interest on the wall with a simple grid pattern that we painted in two different sheens.
For the living room we removed the stone fireplace and wanted to do a more streamline surround. The walls were all faux finished so painting over was a bit of a challenge. We kept the existing tile floor and replaced all the furniture and window treatments.

Living room before photo (above).

2019 © Nickolas Sargent Photography
Living room after photo (above).
In the dining room we removed the huge built in furniture piece and replaced all the columns. I don't know why I forgot to have photos of the columns taken because they came out really great!


Dining room before photos (above).
In the photo above, that door way is what we opened up creating the open kitchen plan.

2019 © Nickolas Sargent Photography
Dining room after photo (above).
The master bedroom had so many layers of window treatment that the room was so dark. All the furniture was heavy and the faux finished walls were drab. We wanted to brighten the whole space up so we used a serene color pallet.

Master bedroom before photo (above).

2019 © Nickolas Sargent Photography
Master bedroom after photo (above).


These are photos of the entry way. You can see in the reflection of the mirror how we changed the iron gate opening.

2019 © Nickolas Sargent Photography
Last but not least is the closet. My clients had a room that they used as an "office" but it really just became a storage room. We decided to remove the closet inside the room and turn the entire room into "her" closet. We wanted it to be elegant and feminine. We created a built in bench under the window so she can sit and put on her shoes. The island is filled with drawers for her jewelry and clothing. I don't have a before pic sorry.
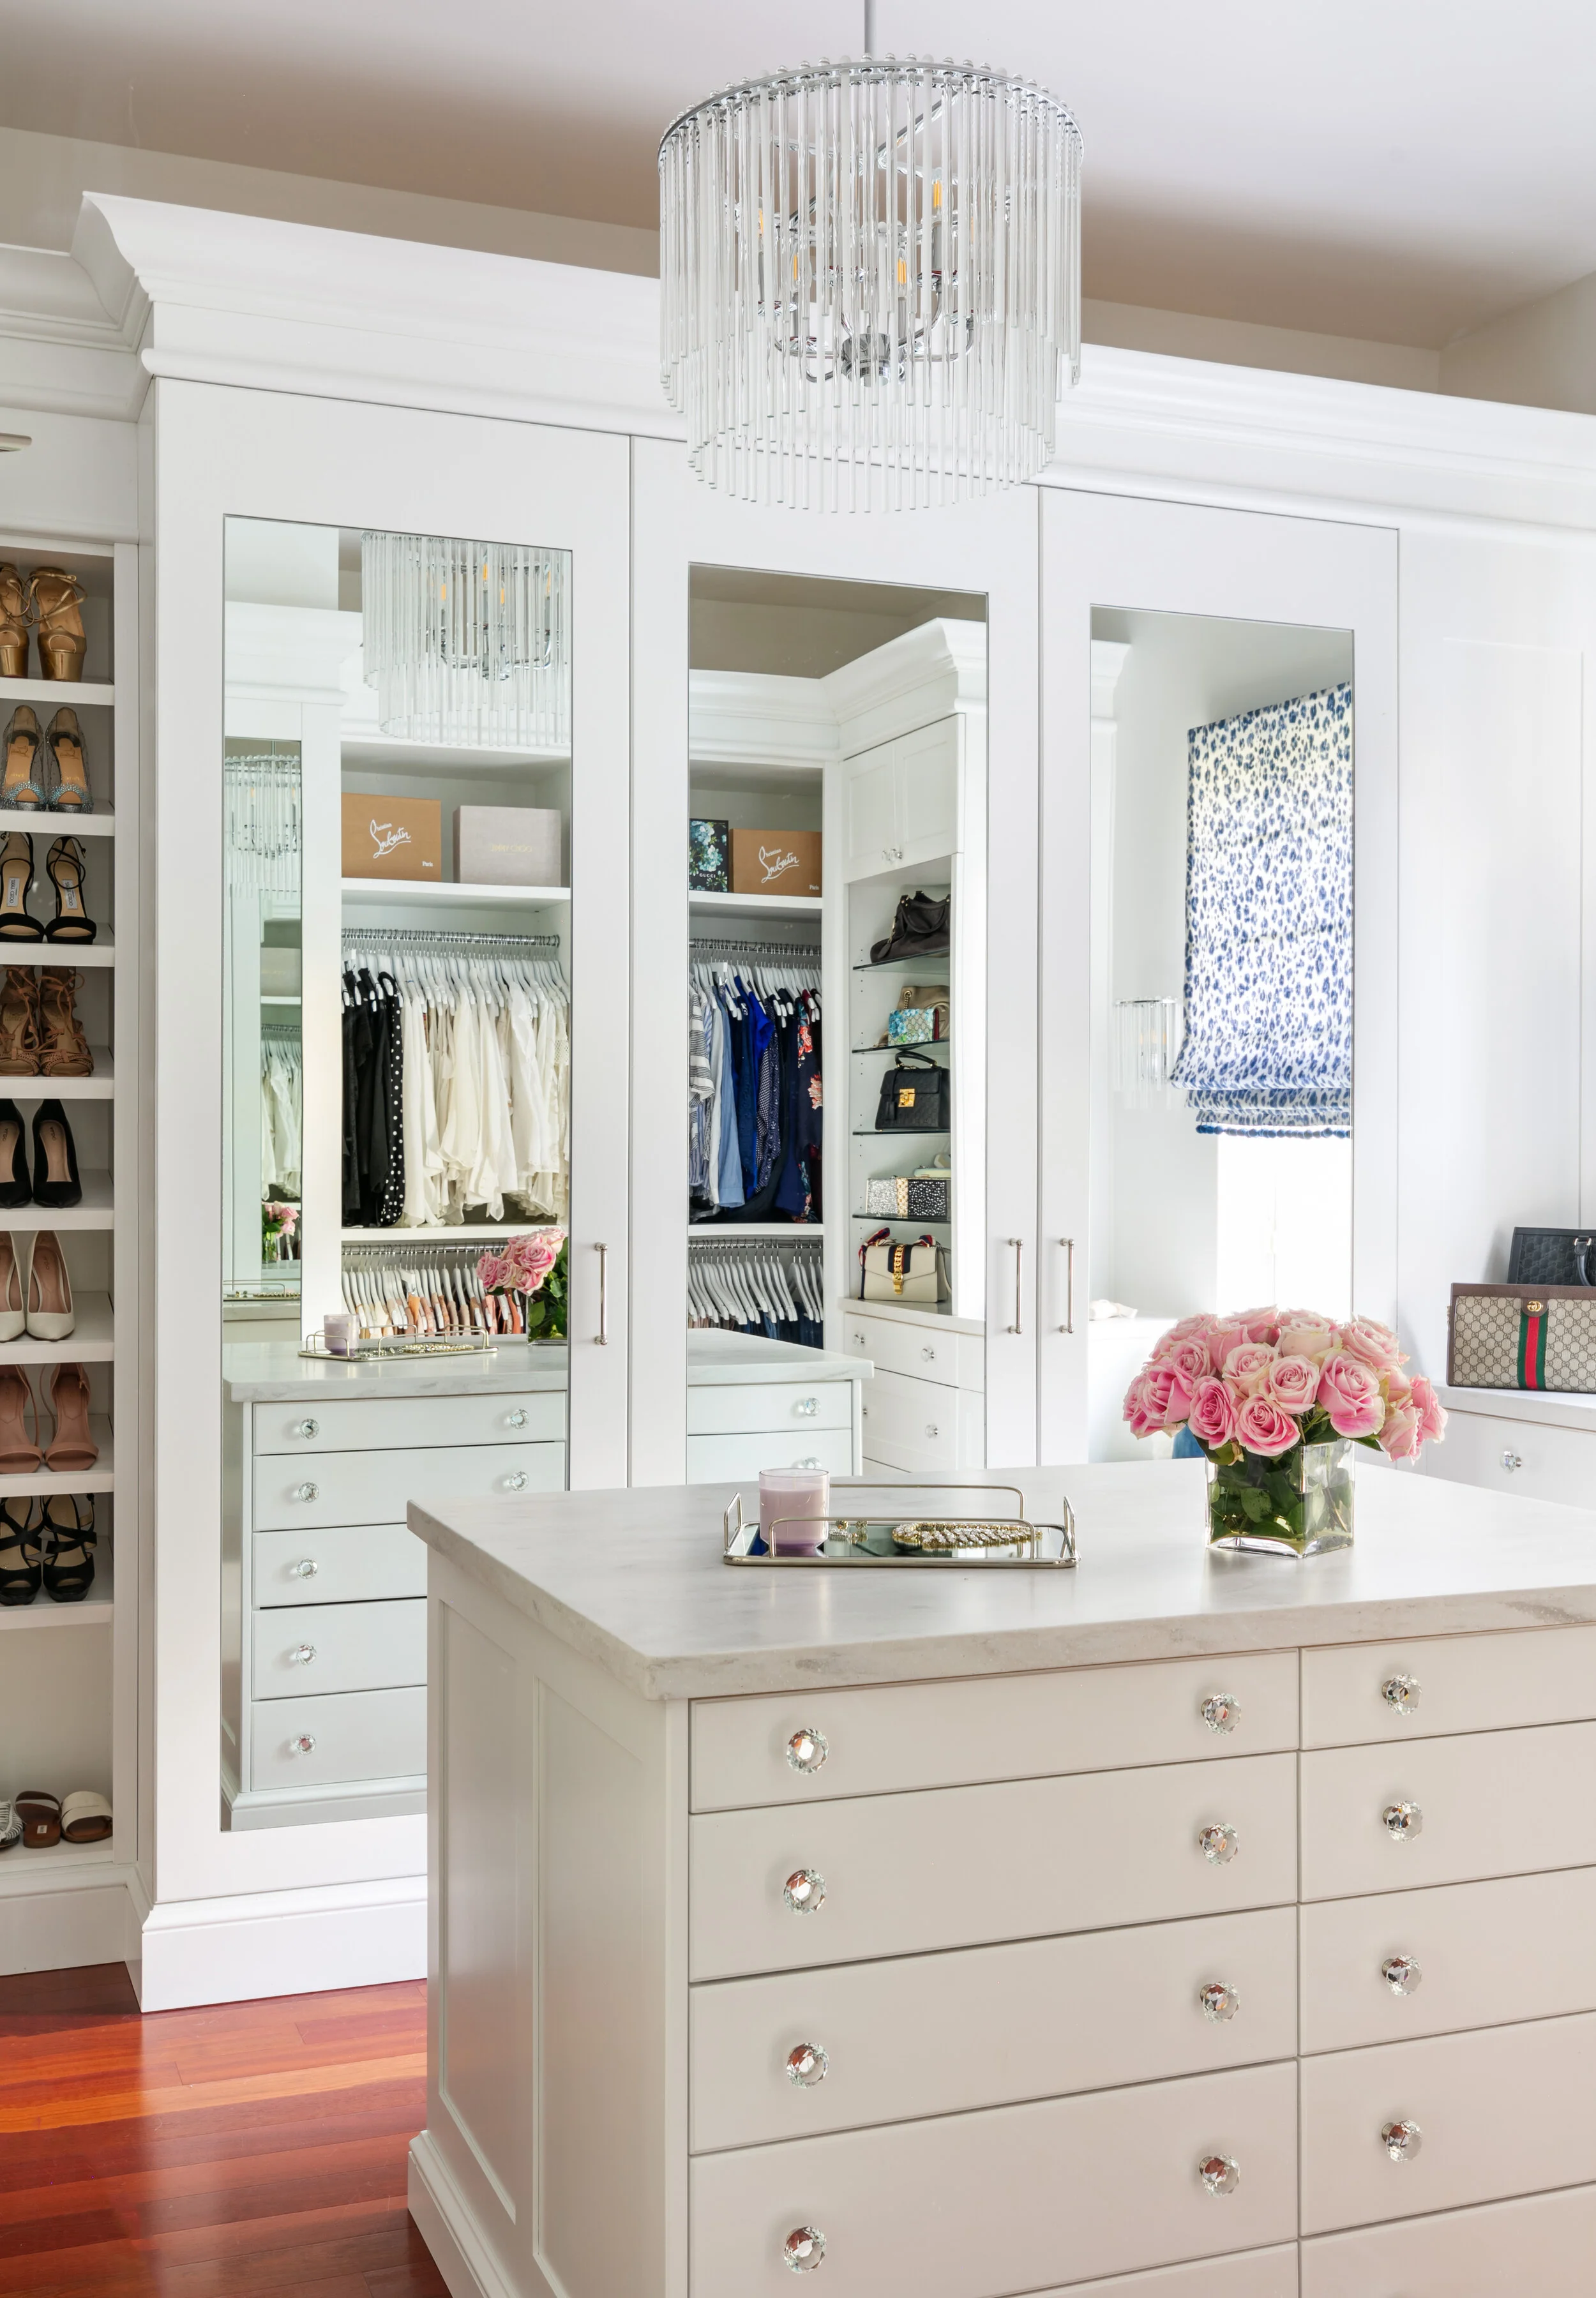
2019 © Nickolas Sargent Photography
I hope you enjoyed this before and after. Go to the PORTFOLIO page to see the rest of this transformation.
XOXO
Jennifer